Skip to content

Project Vulnerability

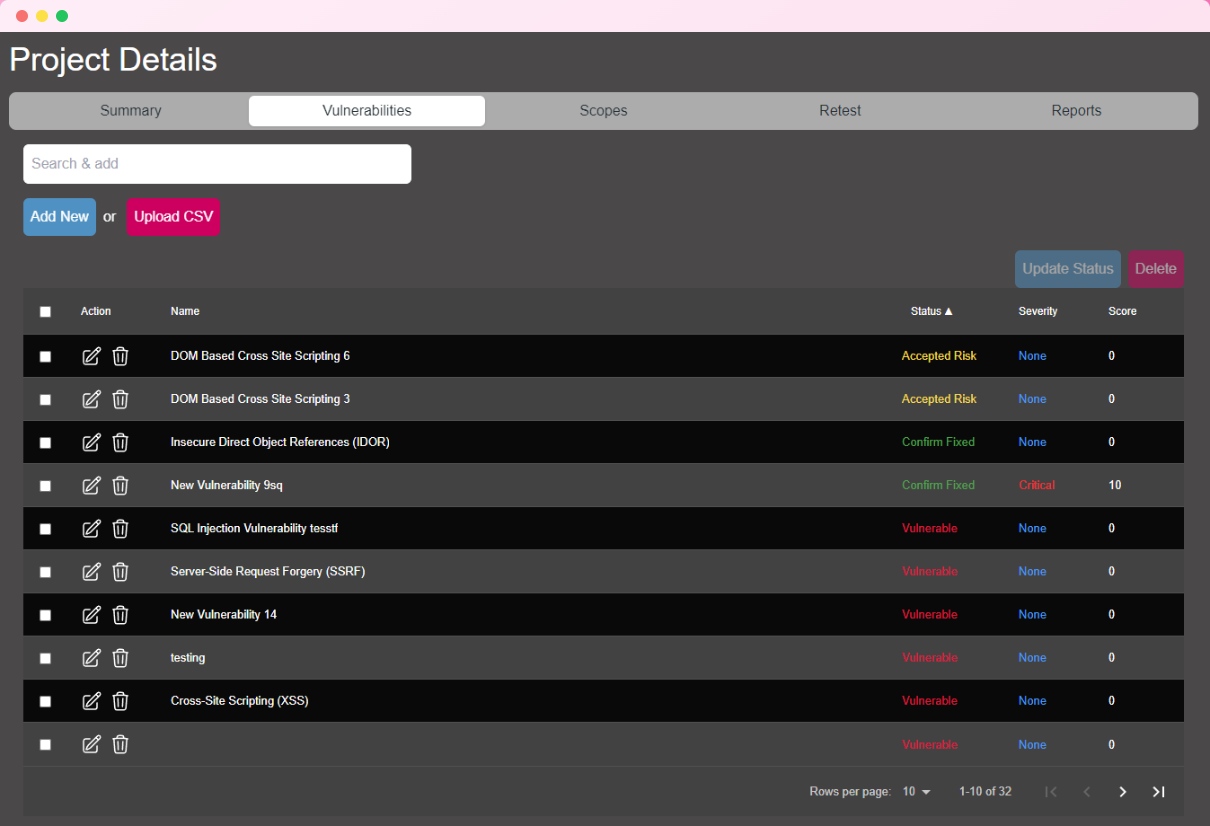
Each project can have associated vulnerabilities. You can navigate to the Vulnerability tab within a project to manage its vulnerabilities. This tab allows you to add, edit, or remove vulnerabilities specific to that project, providing a dedicated space to document identified security issues, their descriptions, solutions, CVSS scores, and other relevant details.

Using the Vulnerability Database, you can quickly import common vulnerabilities with pre-filled information, saving time when adding recurring or well-documented issues across multiple projects.

Project Vulnerability

Adding Vulnerabilities

APTRS provides multiple ways to add vulnerabilities to a project, offering flexibility in how you manage and document security issues.

  • Search and Add: This feature allows you to search for vulnerabilities by title or name from the Vulnerability DB or Template. Once you select a vulnerability from the search results, a new entry is created within the project, automatically populated with the title, description, solution, reference link, and CVSS score from the Vulnerability DB. This approach allows for efficient reuse of information with pre-filled details, saving time on repetitive entries.

  • Add New: Selecting "Add New" will create a blank vulnerability entry within the project. All fields are initially empty except for the title, which is set to "New Vulnerability." This option is ideal if you need to manually document unique vulnerabilities not in the database. You can fill in all required details such as description, solution, and severity.

  • Upload CSV: This option is designed specifically for importing vulnerabilities from Nessus scan outputs. You can upload a Nessus vulnerability scan CSV report, which APTRS will parse to extract details such as URL or IP, port, title, description, and more. Parsed vulnerabilities are then added directly to the project, saving time on data entry for larger assessments.

Nessus CSV

This feature can also be used for other, non-Nessus scan reports. As long as the CSV file contains the required columns with matching names, APTRS will process it just like a Nessus report, making it a versatile option for importing vulnerabilities from various sources.

Required CSV Columns

To ensure that vulnerabilities are parsed correctly, your CSV file should include the following columns:

  • Host: The IP address or URL of the affected system.
  • Port: The network port where the vulnerability was found.
  • Name: The title of the vulnerability, providing a brief identifier.
  • Description: A detailed explanation of the vulnerability, including its nature and potential impact.
  • Solution: Recommended actions or patches to mitigate or resolve the vulnerability.
  • Risk: The severity level of the vulnerability (e.g., Info, Low, Medium, High, Critical). APTRS uses this to assign a default CVSS score and vector.

CVSS Score and Vector

As of version 1.0, APTRS does not accept CVSS scores and vectors from CSV imports because default Nessus reports do not include them. Instead, APTRS assigns a default CVSS score and vector based on the Risk level provided in the CSV file.

Default CVSS Scores and Vectors (CVSS 3.1)

These default values are automatically assigned based on the risk level when the CSV is parsed:

Severity Base Score Vector
Critical 9.8 CVSS:3.1/AV:N/AC:L/PR:N/UI:N/S:U/C:H/I:H/A:H
High 7.6 CVSS:3.1/AV:N/AC:L/PR:L/UI:R/S:U/C:H/I:H/A:L
Medium 5.5 CVSS:3.1/AV:N/AC:L/PR:L/UI:R/S:U/C:L/I:L/A:L
Low 3.5 CVSS:3.1/AV:N/AC:L/PR:L/UI:R/S:U/C:L/I:N/A:N
Informational 0.0 CVSS:3.1/AV:A/AC:H/PR:L/UI:R/S:U/C:N/I:N/A:N

These defaults ensure consistency in reporting for imported vulnerabilities, even if specific CVSS details aren’t included in the CSV file.

Vulnerability Instances

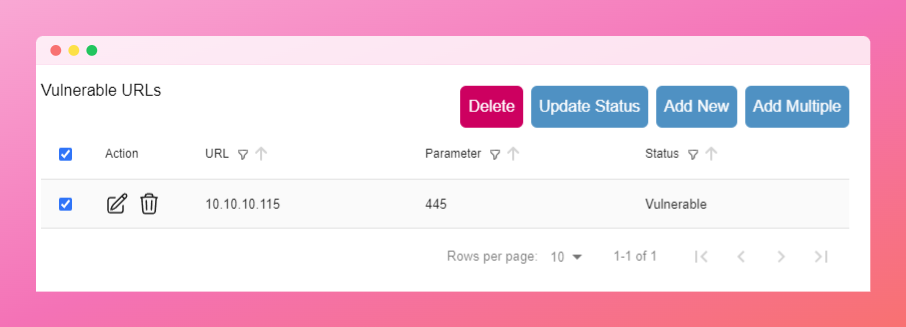
Each vulnerability in a project is required to have an instance. An instance represents the specific URL, parameter, IP address, and port number of the affected vulnerability. Each instance within a vulnerability can have its own status, allowing for more granular tracking and resolution.

Vulnerability

Vulnerability and Instance Status

The status of each vulnerability and its instances is tracked individually to provide clear insights into the resolution progress. Below are the details on how the status is managed and calculated for both vulnerabilities and their instances.

The status of a vulnerability and its instances are interconnected. There are three possible statuses for both vulnerabilities and instances:

  • Vulnerable: The vulnerability or instance has unresolved security issues.
  • Confirmed Fix: The vulnerability or instance has been resolved and no longer has security issues.
  • Accepted Risk: The vulnerability or instance remains unresolved, but the customer or client has accepted the associated risk.

These statuses function as follows:

  1. Changing Vulnerability Status: If you change the status of a vulnerability, all instances associated with that vulnerability will automatically be set to the same status. For example, setting a vulnerability to Accepted Risk will update all instances within that vulnerability to Accepted Risk as well.

  2. Changing Instance Status: When modifying the status of individual instances within a vulnerability, the overall vulnerability status is recalculated based on its instances' statuses. The rules are as follows:

    • Confirmed Fix: For a vulnerability to be marked as Confirmed Fix, all instances must be set to Confirmed Fix. Even a single instance with a different status prevents the vulnerability from being marked as Confirmed Fix.
    • Vulnerable: If any instance is marked as Vulnerable, the entire vulnerability is marked as Vulnerable, regardless of other instances’ statuses.
    • Accepted Risk: If all instances are marked as Accepted Risk, the vulnerability status will also be set to Accepted Risk.

In short, for a vulnerability to be considered Confirmed Fix, all instances must be Confirmed Fix. To be marked as Accepted Risk, all instances must have that status. Any instance marked as Vulnerable will cause the vulnerability itself to be marked as Vulnerable.